Folks, every now and then you come across a recipe that knocks your socks off. ( unless you are barefoot like me, then it just makes you jump a little ;) ) 

I made this dish over the weekend and Ryan ( who isn't crazy about pork) told me more than once how phenominal they were.

.. I hope that he really meant that, because I'm making them again tonight ( and you should too!)
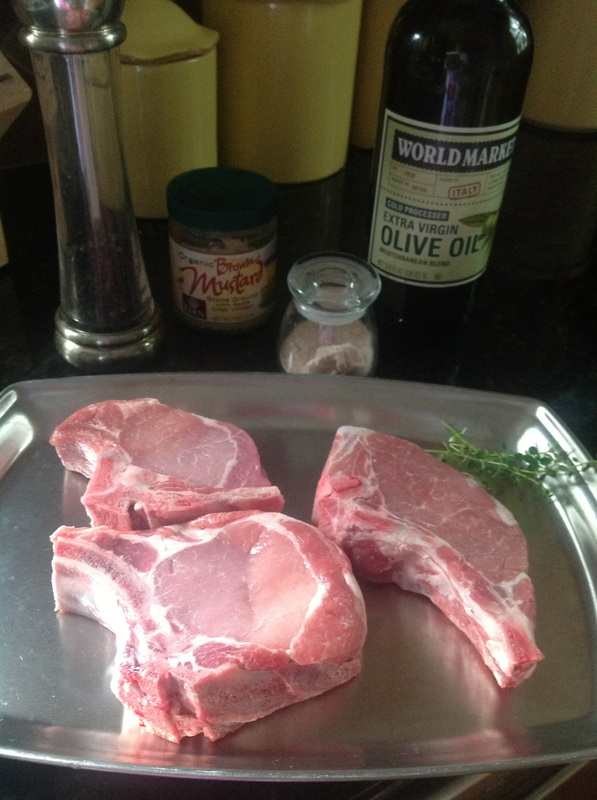
( recipe from dave leiberman)
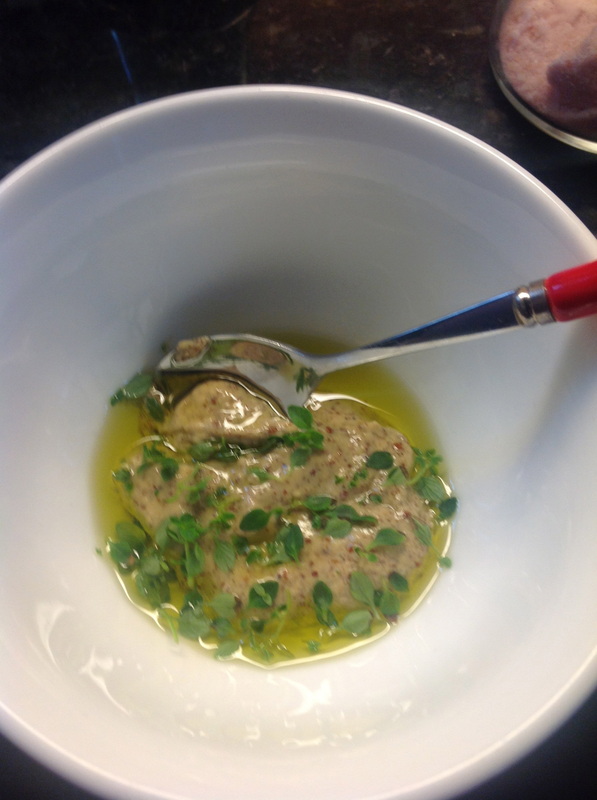
start by whisking together olive oil, mustard, salt, pepper and thyme leaves.  Next take a garlic clove ( not in original recipe, I added this for extra flavor) and run the whole clove on the bone of the chop on both sides
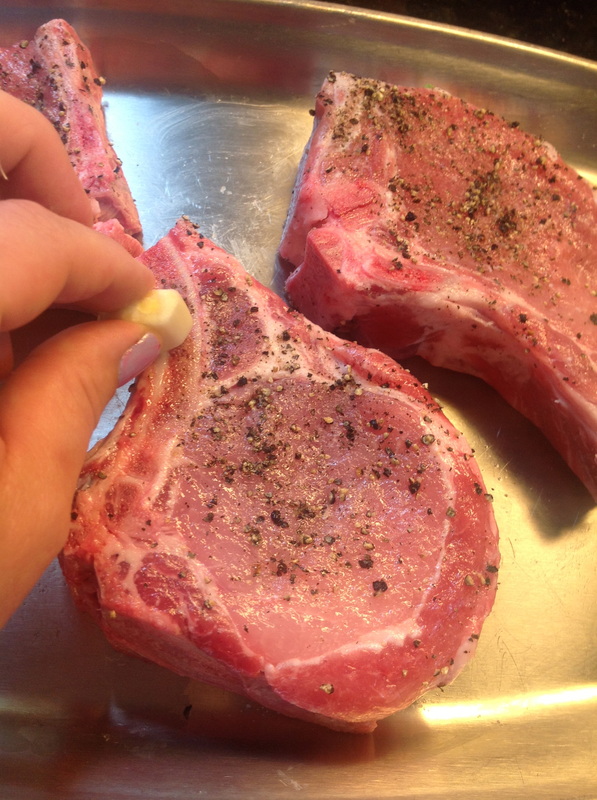
coat chops with mustard mixture, massaging into both side of pork 
next, cover the chops and refrigerate for 2-24 hours.
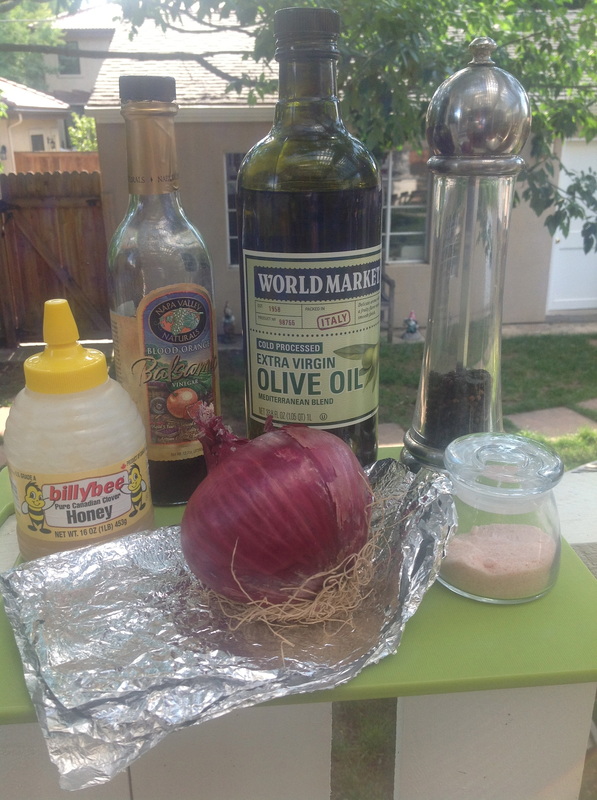
prep onions.  I did my onion recipe on the grill. Start by peeling your onion ( I have red here, but a sweet white onion would work as well) Peel the onion, leaving the bottom in tact. Using a serated knife, cut through the onion about every 1/4 inch going one direction, then rotate half a turn and do the same on the other direction.  ( bloomin' onion style) 
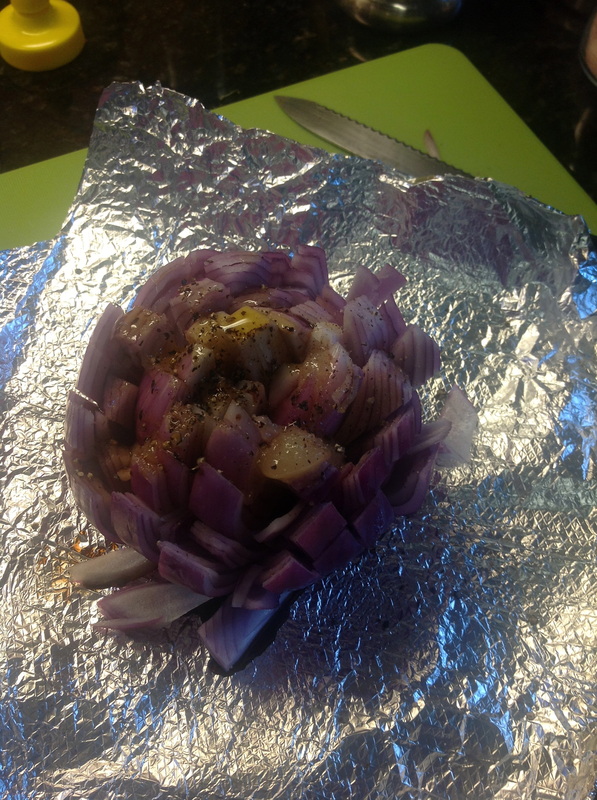
next, place onion on 2 pieces of aluminum foil that are crossing each other. Drizzle 1 Tbsp each honey, balsamic vinegar and 2 tbsp Olive oil.  sprinkle with salt and pepper and wrap up like a big Hershey's kiss. 
 Remove the pork chops from the fridge about 30 minutes before grilling. 
light the grill to medium high heat. 
Place onion on grill ( note.. I cooked this onion on a different day, thus the burger & pepper action) 

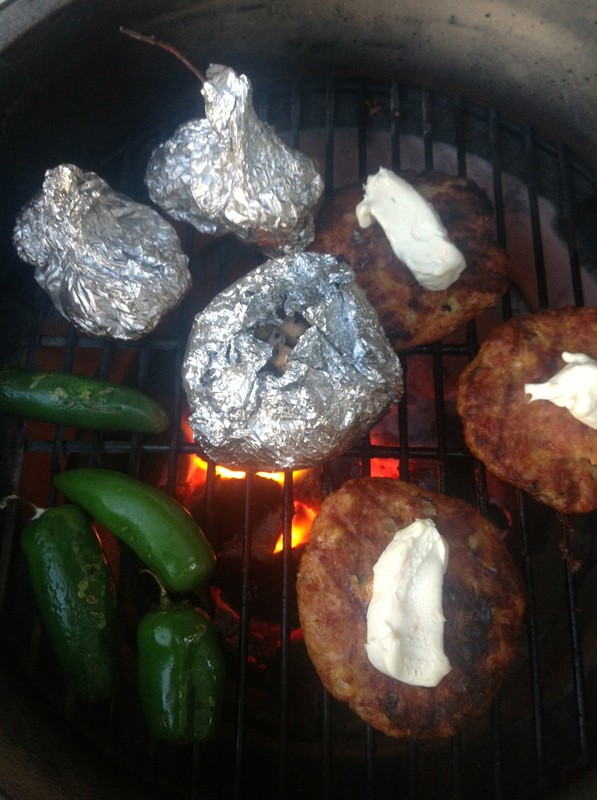
grill pork chops until internal temp is 145. Cook the onions for about 15 minutes, or until they begin to soften. 
remove pork and onion from the grill and let rest.  


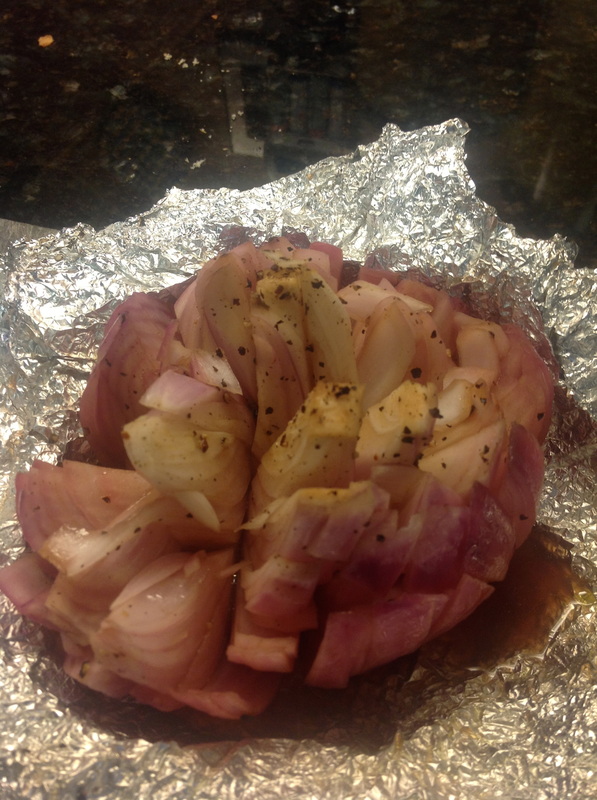
the amount of flavor in this little packet is out of control!  I have made these onions for burgers, chicken, pork.. and actually, just to snack on. so yummy! 

the picture is a little fuzzy, but there you have it!  for another great pork recipe form the past try this one...  http://barefootgirl27.wordpress.com/2010/09/17/dinner-surprise/

happy Thursday, friends! 
 
Admit it. I had you at massaged.. didn't  I ? 


You are probably thinking that I've lost my mind. Or that I typed it wrong. But the truth is... massaging it is exactly how you make this delicious salad! 


Let's start at the beginning. 


Scott and I happened to come across a restaurant one day while house hunting.. True Food Kitchen. 


It is a restaurant based on the anti- inflammatory diet by Dr Andrew Weil MD.


It is an open- kitchen restaurant, where everything is made fresh, organic when possible, sustainable- in season , and crazily good!

The drinks are all amazing..  Kale- aid is my fav....  They have all sorts of crazy drink options, made with fresh juice, both alcoholic and non- alcoholic. 

Trust me, friends... if you were to come visit me  out here, this is the first place I will take you... I promise !


Scott bought me the cookbook and I have made a few recipes from it ( on a side note, I am so happy to be settled and have the time to cook again... this past year has been nothing short of crazy! ) 

One of my favorite recipes from the cookbook is the kale salad ( which is served on the side of many entrees) 
This is my version of it.. tweaked just a little bit. You can find the original on the web if you google it. ( otherwise I couldn't share the recipe here) 


~1  bunch fresh kale ( I like the lacinto or dinosaur kale, but any kind will work )  this time of year you can find it at any farmers' market... 

~juice of 1 lemon
~ about 1/4 cup olive oil
~ about a teaspoon of Dijon mustard
~ 1-2 garlic cloves... depending on how much garlic you like
~1/4 cup grated parmesan cheese ( plus a little extra for curls on top)
~1/4 cup dried cranberries
~ 1/4 cup slivered almonds ( not pictured.. it was an after-thought... but a very good one ;) 
~ sea salt and pepper


start by crushing garlic clove with the back of a knife ( or chopping super- fine) and add it to serving bowl. Add lemon juice, mustard, salt, pepper and whisk in olive oil.  Rinse kale and pull the leaves away from the ribs. Discard ribs. 

this is what your empty ribs should look like.... sounds sad, doesn't it? 
next tear up of cut your kale leaves into bite- sized pieces, adding them directly over dressing.

next, with clean hands... get in there and massage the dressing into the leaves.   it should only take 2-3 minutes. 


mmmm... look at that yumminess! 

next, top with the cheese, cranberries & almonds. 

cover and refrigerate until ready to eat. , Toss right before serving.

I like to make this a few hours in advance.... in fact it's one of those salads that is just as good the next day! 


and there you have it.... my favorite summer salad ( then again, I think that all of them are my favorites.  

you can have fun with the toppings here, too...  last week I made it with blue cheese, dried cherries and candied walnuts....

I encourage you to try this... it's a healthy, impressive easy one - dish wonder!
ciao bellas! 
 
when I was younger I remember eating cucumber upon cucumber throughout the summer. My mom used to make a creamy cucumber salad that was oh so good a refreshing.

with he discovery of Greek Yogurt recently, I have been using it ( the non fat plain) In places of higher- fat ingredients.  This has been my favorite recipe so far this summer ( ask poor Scott, I make it almost nightly ) 

Lightened- up creamy cucumber salad

1 cucumber
about 1/2 cup of Fat Free plain Greek Yogurt
1 Tablespoon mayonaise ( use ligth if you can.. the boys bought this) 
1 Tablespoon sea salt
1/4 cup finely chopped onion
1 garlic glove, minced
1 Tablespoon dried dill ( or fresh if you have it )
grating of fresh ground pepper

a fine mesh strainer.
start by peeling your cucumber and cut it into thin slices. I like to cut my slices in half because I love the little moon shapes :) 

then place your strainer over a bowl and sprinkle cukes with salt. using your *clean* hands or a spatula, make sure that all cuke slices are covered with salt. 


let rest for about 15 minutes.

The salt is drawing out extra moisture from the cucumbers ( since there is so much water in these babies) which will in turn help to have your salad not be overly watery. 
you can skip this step, but I like the consistency if I do this .


Picture
there's not alot of liquid, but trust me, it's enough !
next, using a spatula, press as much liquid out as you can. I never find that the finished dish tastes too salty , but if you are concerned, then use a paper towel to blot any excess salt. 
remove strainer from bowl and wipe bowl clean of any liquid.

Crush your garlic clove and mix with remaining ingredients , adding reserved cucumbers last. 


Picture
YUM!
cover with plastic wrap and refrigerate until ready to eat.

enjoy!

xoxo